
Adding multiple trusted destinations
Introduction
You can add multiple trusted destinations at once by uploading a file containing all information that would otherwise be requested in the web dashboard or mobile app. Trusted destinations require specific information in order to be valid, and the below instructions will help you quickly assemble your request. Please contact [email protected] if you have questions.
Adding multiple trusted destinations with a file upload
- Download the provided Excel spreadsheet template.
- Open the Excel spreadsheet template in your preferred spreadsheet editor (e.g. Excel, Google Sheets) and fill out the template.
To open in Google Sheets, import the Excel spreadsheet template into Google Sheets as described here and then convert Excel spreadsheet template to Google Sheets as outlined below.
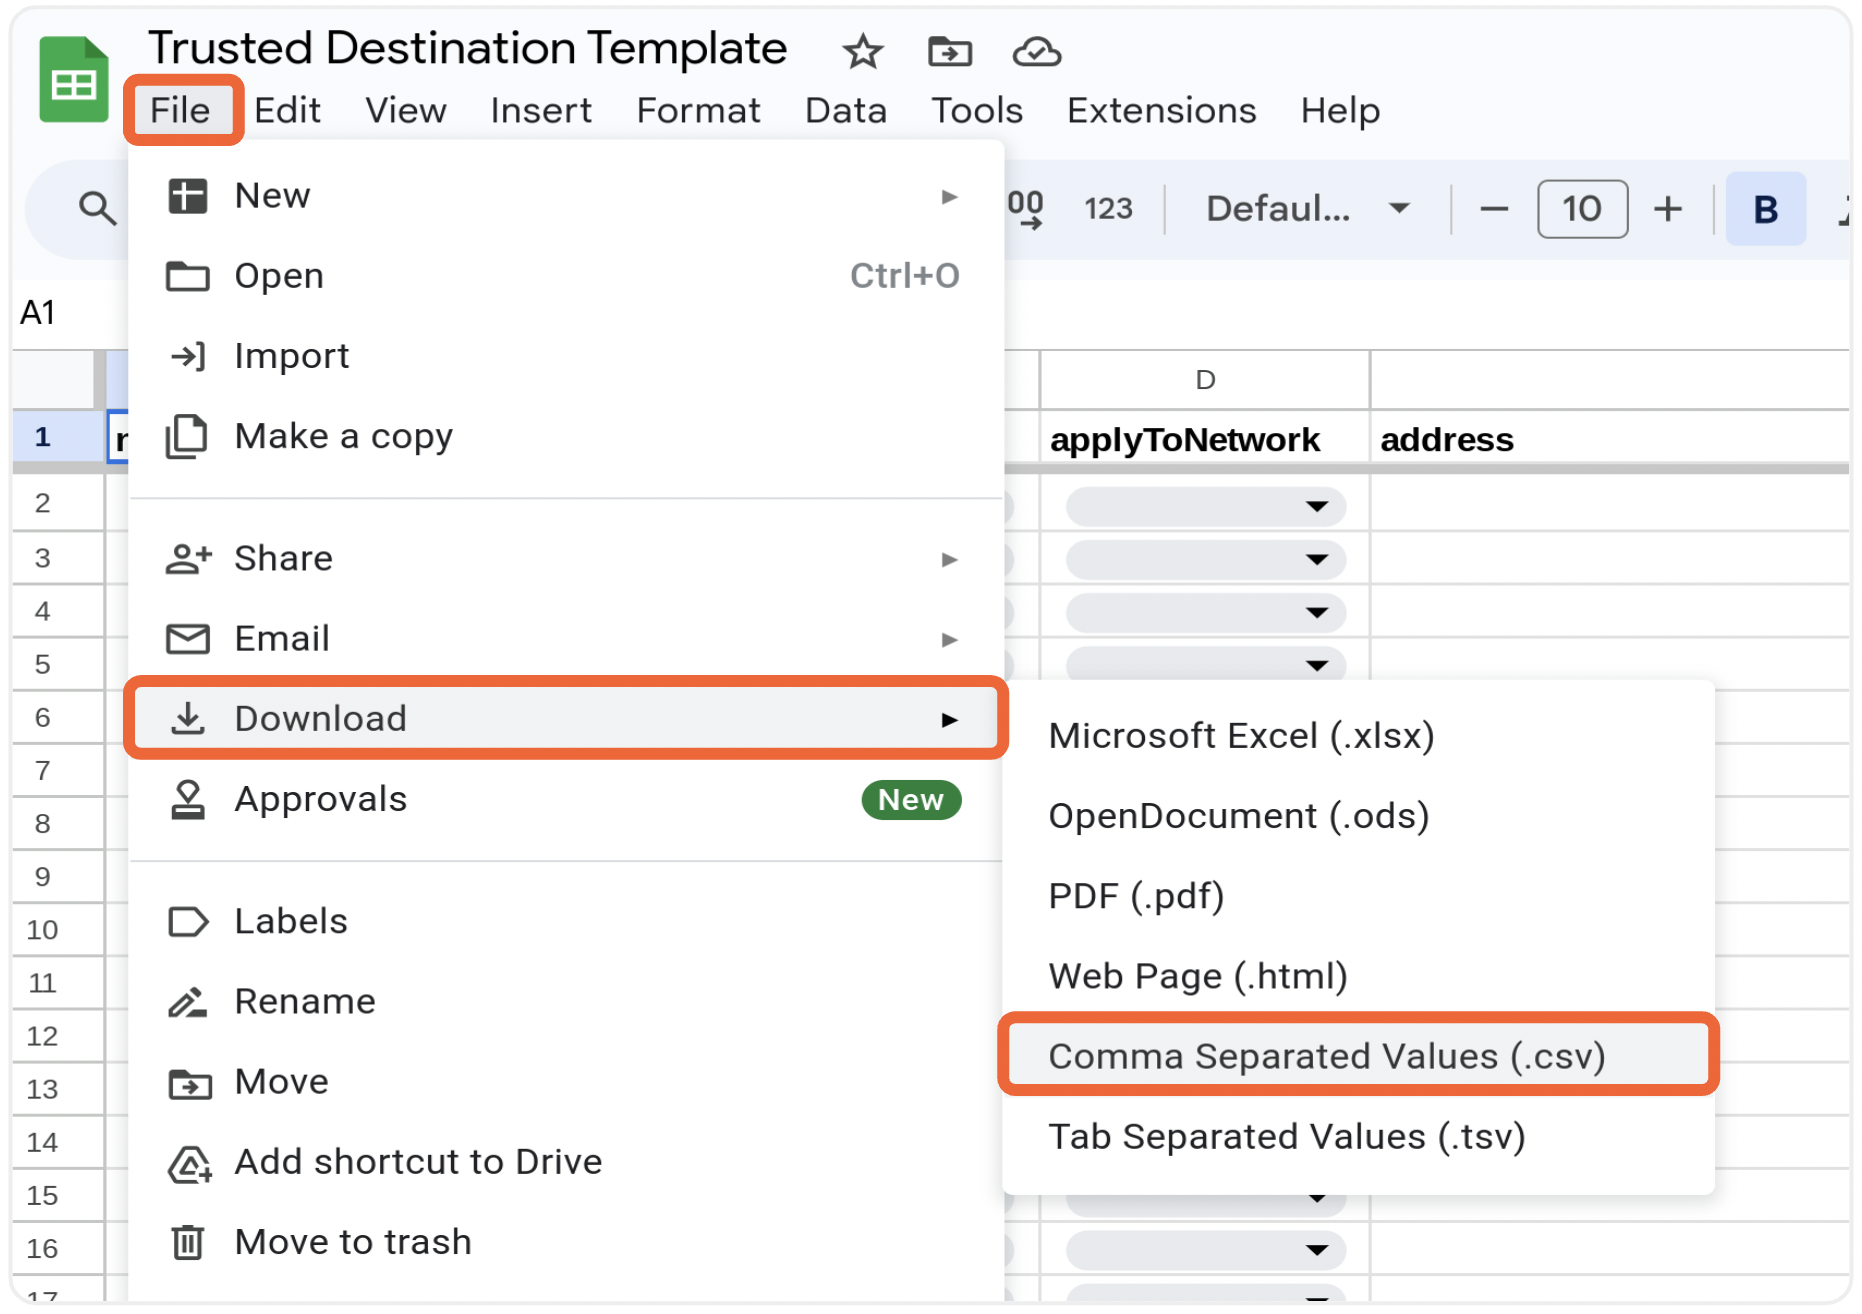
- After you have completed filling out the template, download it as a CSV file.
If you are using Excel, follow the instructions to download as a CSV file. If you are using Google Sheets, go to File > Download > Comma Separated Values (.csv)
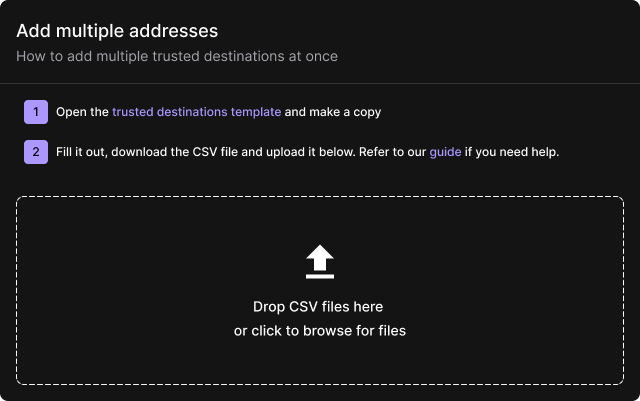
- In the web dashboard, go to Settings > Trusted destinations. Select Add, then Upload multiple from file when prompted, and upload your completed CSV file.
Filling out the trusted destinations template
The fields in the template correspond to the fields you complete when adding a trusted destination in the web dashboard or iOS app. Therefore, completing the template is similar to the process of adding trusted destinations in Porto.
Fields in template:
name:* The name of the trusted destination as it will appear in the web dashboard or iOS app when choosing destination addresses for withdrawals.
assetType:* The ticker of the type of asset for which you would like to create a trusted destination. You can select from the predefined types in the spreadsheet. Unknown types will not be accepted and result in an error.
networkName:* The name of the blockchain network for which you would like to add a trusted destination—e.g. USDC on the Ethereum network. You can select from the predefined types in the spreadsheet.
applyToNetwork: Select true if you would like the trusted destination address to apply for all asset types for a given blockchain network—e.g. any asset type on the Ethereum network can be sent to a single trusted destination. Note that this is only applicable to asset types on the Ethereum network at this time. If you select true for other networks, the value denoted for asset type will be ignored.
address:* The address to be added as a trusted destination for the provided blockchain network—e.g. 0x…1234 for the Ethereum network.
memo: Any additional information that can be provided with certain asset types and blockchain networks. Networks supported in the memo field are: ATOM (Cosmos), AXL (Axelar), BLD (Agoric), DYDX_CHAIN (Dydx Chain), EVMOS (Evmos), HASH (Provenance), OSMO (Osmosis), RMO (Rarimo), ROSE (Oasis), SEI (Sei), and XRP (Ripple). Entering a memo for a network that does not support the memo field will result in an warning.
description:* A short description of the trusted destination.
Note: Required fields are marked with a red asterisk (*).
Submitting the trusted destinations file
- Upload the CSV file to the web dashboard.
- Porto will parse the file and allow you to review the submitted information and address any resulting warnings or errors, if any. If errors are discovered that cannot be resolved, Porto will ask you to correct them and upload the file again.
- Select Submit to begin adding the trusted destinations to your organization once you are satisfied with the results. You will be prompted to approve the addition of your new trusted destinations on your iOS device, and the operation will require quorum approval as well.
- After the operation is approved and reviewed, your new trusted destinations will be added to your account and you will receive a notification that confirms completion of the operation.
Updated about 1 year ago